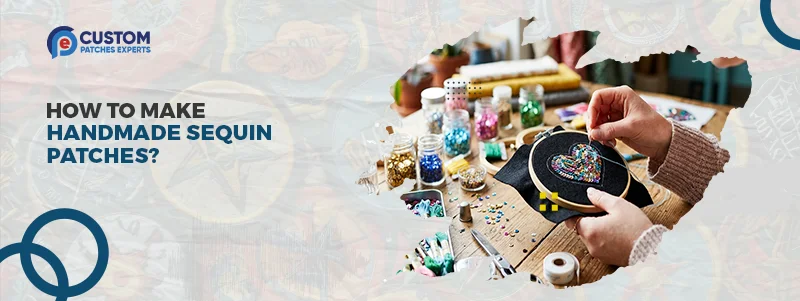
How to Make Handmade Sequin Patches?
Want your designs to shine and attract attention instantly? Handmade sequin patches are the best for this purpose. They give your jacket, hat, or bag a sparkly, colorful, and textural look. The best part is you don’t need a factory to make these patches. With a few simple tools and a little patience, you can make these patches that are clean, daring, and sale-worthy.
If you are building a brand or are a craft lover, this tutorial is for you. We are going to take you through the entire process step by step. So, let’s get started.
What Are Handmade Sequin Patches?
Sequin patches are fabric patches sewn with shiny discs called sequins. The shiny nature of the sequins makes them look bright and eye-catching. You can sew sequin patches by hand or with a sewing machine, based on what you have.
Many businesses prefer these patches because they stand out more than other designs. Custom sequin patches are often made in bulk by professionals. However, handmade ones show more creativity.
Order Your Custom Patch Now!
Tools & Materials You Will Need
Before you begin, collect all your materials in one place, and your work will be smooth and quick.
- Base Fabric: Felt, Twill, or Cotton. Felt is recommended if you are a beginner, as it maintains shape.
- Sequins: Select one that matches your design in terms of size and color.
- Needle: Use one that is thin enough to go through the sequins.
- Thread: Use strong polyester thread, as it will be more durable.
- Fabric Marker or Chalk: This will be useful in drawing your design onto the fabric.
- Scissors: Use sharp scissors that will give you a neat finish.
- Embroidery Hoop (Optional): It will be easier if you use one, as it will keep your fabric taut.
- Backing Material: It could be iron-on, velcro, or sew-on, depending on what you prefer.
Step 01: Plan Your Design
Keep your design easy if you’re a starter. Letters, logos, and icons are ideal for a first project. Draw your design on a piece of paper, and then transfer it onto your fabric using a marker or chalk. Make sure your lines are light, so they won’t be visible when your patch is complete. Also, make sure your design isn’t too complex for your patch size, or it might look messy.
Step 02: Cut the Base Fabric
Once your design is ready, the next step is to cut the fabric slightly larger than the design. This is because you need some extra space to work with. Put the fabric in the hoop, if you have one. If you do not have a hoop, make sure the fabric is not loose.
Step 03: Start Stitching Sequins
- Insert the needle and tie a knot at the end of the thread.
- Insert the needle up through the fabric at the place where you would like to position the first of your sequins.
- Insert a sequin onto the end of the needle and then push the needle down near the edge of the sequin.
- For extra strength, you can push the needle through the sequin a second time.
- Follow the guidelines you created while stitching.
- Space the sequins evenly so the patch looks clean and neat.
- Place the sequins close together if you would like a full look.
- Place the sequins far enough apart if you would like a lighter look.
- This step takes the longest, but it’s where your patch starts to come to life.
Step 04: Fill the Design
Keep adding the sequins until you cover the entire design. Make sure to check your work. If the sequin is loose, restitch it. It is also important to try to keep the rows straight. This will give the patch a more professional look.
If using different colors, it is important to decide where each one will go before starting. Some people use various textures by adding thread fillings and beads to the sequins. This will give the patch a richer look.
Step 05: Secure the Edges
Next, you need to secure the edges after you have finished designing the patch. This is an important part because, without this, the edges will fray. To secure the edges, you need to cut the fabric close to the design, leaving a little space around the edges.
You need to sew the edges with a tight stitch. The blanket stitch is the best stitch to secure the edges. For an even better look, you can add a border using a thin thread or cord. This is the same method that custom-printed patches use to secure the edges.
Step 06: Add Backing
Now your patch is ready, but you need to attach it somewhere. If you want an easy fix, you can use iron-on backing. Iron it onto the back of your patch.
For removable patches, you can use Velcro. You can also use sew-on patches. These patches will last after many washings. Choose your method based on how you plan to use your patch.
Custom 3D silicone patches are the best option if your design requires a raised or rubber appearance. Sequins can’t match their vibrant vibe.
Are You Ready to Create Your First Sequin Patch?
Making your own sequin patches is easy when you learn how to do it. You can always start with a few and improve your skills along the way. If you want to save time and order in bulk, you can get professional help such as Custom Patches Experts. They can provide a free quote. In any case, sequin patches are a great way to make your designs stand out and grab more attention.
CATEGORIES
RECENT POSTS

Get A Custom Quote
Frequently Asked Questions
It takes a few hours to make a sequin patch, depending on how large and intricate your design is.
For a first-timer, felt is a great fabric to use for your sequin patch, as it holds its shape well. You can also use twill or cotton for a more polished look.
Handmade sequin patches can last long if you use strong thread and sew them well. This keeps them from coming off easily.
Yes, you can wash clothes with sequin patches, but hand washing gently is best. This keeps them in great condition.
You can use a polyester thread, as it does not tear easily and holds the sequins securely in place.
Yes, they can. Beginners can make sequin patches at home. Their work will improve with time.
You can iron it on, sew it on, or use Velcro. This depends on how you want to use it.
Yes, they are good for branding. Sequin patches are very eye-catching. Many companies use them for branding.
Yes, they can be used with embroidery or printed patches. This will give the patches more texture.
You can order your sequin patches in bulk from trusted makers. This will be very useful to growing businesses.
Testimonials
Jason Miller
I was impressed that everything was smooth. I received my proof the same day.
Amanda Rodriguez
The staff was very friendly to work with. Helped me adjust my design.
Chris Thompson
Pricing was the most affordable. Great quality for the price.
Michael Harris
I needed my custom patches urgently. Delivered on time as promised.
Danielle Brooks
I really appreciate their customer service. Very professional team.
Kevin Walker
The delivery time was better than expected. Well packed patches.
Rachel Carter
Clear communication. Pricing was fair and quality was beyond expectations.
Brandon Lee
My team ordered in bulk, and everything was perfect. Highly recommended.