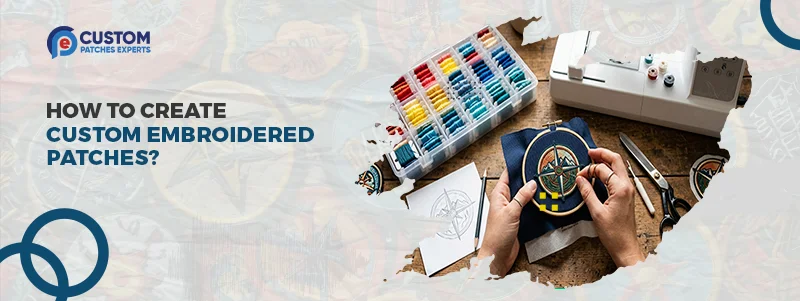
How to Create Custom Embroidered Patches from Scratch
Creating custom patches can be tricky sometimes. Many people find it hard to deal with messy designs, bad stitching, or patches that wear out rapidly. When things do not turn out the way you thought with your logo or idea, then it gets annoying.
Did you ever think about how they create these patches? The best thing is that it is not as difficult as some believe to make custom embroidered patches. Proper working can turn a simple patch idea into a professional one.
In the next 5 minutes, this guide will teach you the entire process from an idea to a finished patch. You need patches for your brand, team, or fashion brand, and this guide will make you know how it works.
We will begin with the first step.
What are Custom Embroidered Patches?
Custom embroidered patches are vest cloth patches that are stitched with colored thread to create a pattern. The design is one with texture and depth due to the use of threads.
The popularity of these patches can be explained by the fact that they are:
- Strong and stable
- Great for logos and text
- Easy to attach to clothing
- Branding and uniforms are made of it.
Embroidered patches are used by businesses, military and biker clubs, and fashion brands to provide a personality to their products.
Order Your Custom Patch Now!
Step 1: Design Your Patch
Each patch originates with a design. Imagine that the picture shows you how your patch will turn out when you sew it up. You can add a company logo, a catchphrase, a mascot, or a symbol design. This helps to identify your brand.
The design is also framed by some patches using shapes such as circles, shields, or rectangles. A powerful patch design must remain basic. The design features clean stitching from an embroidery machine.
It uses bold lines, fewer colors, and distinct shapes. Readability of the text at a short distance should also be excellent. When a design contains many small details, then the stitching might not be visible.
Most brands choose 3D embroidered patches when they want their logo to look bolder. The designers stitch these patches in a raised style, giving the design extra depth.
Step 2: Select the Patch Size and Shape
When you have completed your design, the second thing would be to select the size and shape.
Common patch sizes include:
- 2-inch: small hat patches.
- 3-inch: Jackets and uniforms are popular.
- 4-5 inch: bigger patches to use on the backpacks.
Popular Patch Shapes
- Circle
- Rectangle
- Square
- Oval
- Custom die-cut shapes
Your form should match the design. As an example, shield shapes are commonly used as badges, and circles are good with a logo.
Step 3: Select the Patch Fabric
The surface is the bottom layer for the embroidery thread. It gives the patch its structure.
Embroidered patches are usually done on two types of fabrics. The twill fabric is the most common type of fabric that people prefer because it is smooth and very durable. It assists the stitching to lie upright on top of the patch.
Another option is felt fabric. It’s softer and gives the patches a vintage look. Vintage-style patches are made of felt on a regular basis.
The fabric color and the thread colors used for embroidery should contrast. This will make the design stand out.
Step 4: Pick the Thread Colors
The patch design is brought to life by thread color.
Embroidery uses a variety of colors, which include a wide range of shades, and thus you are able to match your brand colors.
Things to keep in mind:
- Use 3–7 colors for best results
- Select bright threads for visibility
- Ensure that the text colors are in contrast with a background.
Quality threads also do not fade away, and therefore the patch maintains its appearance after washing and daily use.
Step 5: Scan the Patch Design
The design should be translated into a digital embroidery file before the patch can be stitched. This is termed as digitizing.
Digitizing is the command to the embroidery machine:
- Where each stitch goes
- Which thread color to use
- The order of stitching
The process is done with great caution at the professional patch companies, which ensure that the finished patch appears clean and correct.
Step 6: Begin the Embroidery Process
Following digitalization, the design is loaded into an embroidery machine. The design is stitched on the fabric using colored threads using the machine.
The process typically includes:
- Stitching the base design
- Filling areas with thread
- Adding borders and details
In the case of 3D embroidered patches, foam would be placed beneath thread in order to bring out the raised effect. This provides the design with a deeper texture.
Step 7: Add a Border
Each patch requires an enclosure to keep the threads in place and not to allow them to fray at the edges. The most traditional type of border is a merrowed one. It features thick stitching around the patch’s border. This technique works best for simple shapes like circles or rectangles.
Another option is the heat-cut border. It gives a clean edge and works well on patches with custom shapes. The border will make the patch look sharp and professional while also protecting it.
Step 8: Choose a Patch Backing
Patch backing defines the method of attachment of the patch to the clothing.
Some of the most popular ones are available.
Iron-On Backing
- Heat activated
- Easy to apply with an iron
- Great for DIY use
Sew-On Backing
- Most durable option
- Specialty: uniforms and heavy wear.
Velcro Backing
- Removable patches
- Well-liked in the military and military tactical equipment.
Custom PVC patches are also selected by some brands in case they require waterproof and rubber-like patches, which they use outdoors.
Step 9: Patching and Cutting a Patch
The patches are cut out of the fabric sheet after embroidery is done.
The last process of finishing would involve:
- Cutting the patch shape
- Trimming loose threads
- Inspecting the quality
At this point, the patches will be packaged and delivered.
Need Help To Create Custom Patch
Right Now!
Why Businesses Go For Custom Embroidered Patches
Decoration goes beyond custom patches. They assist companies in developing a good brand identity. Here are some key benefits:
1. Strong Brand Visibility
Patches show your logo on clothing, bags and gear. This makes ordinary products brand promotions.
2. Professional Appearance
Teams and staff are provided with uniform patches, and this makes them look clean and organized.
3. Long-Lasting Quality
Embroidered patches of high quality take years to fade away or peel.
4. Cost-Effective Marketing
Patches are wearable advertisements. After being attached, they continue to advertise your brand on a daily basis.
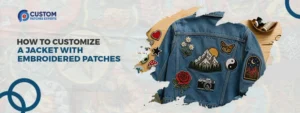
Custom Embroidered Patches vs. Other Patches
Embroidered patches are very popular, but they aren’t the only option available. The patch styles vary. The purpose, design, and environment where users will apply them determine their dependence.
The most traditional type is embroidered patches. They use stitched threads to create a classic textured look for the patch. These patches work well for logos, brand names, and text designs. The stitching adds depth and makes them last longer.
Other brands also use 3D embroidered patches when they want their design to gain market. Raised stitching creates these patches, giving them a bold, elevated appearance. Due to their high visual effect, they are usually applied in hats and fashion objects.
Another option is PVC patches. They make them from a soft, rubber-like material instead of thread. These patches are waterproof, very tough and flexible. That’s why they’re often used for outdoor gear. They’re also popular in tactical gear and sports accessories.
The patches are of a different purpose. Many brands offer different patch types in their product lines. This variety caters to different applications.
Tips for Ordering Quality Patches
When seeking professional findings, start with a clear plan. Also, work with skilled patch creators. Ensure that your logo file is of high resolution to make the details distinct in the embroidery.
Basic and direct designs tend to have the most optimal outcome. It is also used to select thread colors that contrast with the background fabric. Quality assurance comes from reliable manufacturers.
They provide design support, quick production, and thorough quality checks before shipping. This will assist in making sure that the patches you receive appear to be the design that you approved.
CATEGORIES
RECENT POSTS

Get A Custom Quote
Frequently Asked Questions
We make custom embroidered patches by stitching designs onto fabric. Embroidery machines do this. The process includes design digitizing, stitching, cutting, and adding backing.
Most embroidered patches use twill or felt fabric as the base material. Twill is the most common because it is strong and smooth for stitching.
The most common patch sizes range from 2 to 5 inches depending on where the patch will be used. Smaller patches work well for hats, while larger ones fit jackets and backpacks.
High-quality embroidered patches can last for many years with proper care. Strong thread and durable fabric help them keep their color and shape.
Embroidered patches use thread to stitch designs, giving them a classic, textured look. Custom PVC patches are made from rubber-like material and are waterproof and flexible.
3D embroidered patches use raised stitching that makes parts of the design stand out. This style is popular for hats and bold logos.
You can attach embroidered patches using iron-on backing, sewing, or Velcro. Sewing is the best option.
Yes, most patch manufacturers can create patches using your logo or artwork. You usually need to provide a clear image file of the design.
Order high-quality custom embroidered patches from trusted makers like Custom Patches Experts. They offer professional stitching, fast turnaround, and free quotes.
Testimonials
Jason Miller
I was impressed that everything was smooth. I received my proof the same day.
Amanda Rodriguez
The staff was very friendly to work with. Helped me adjust my design.
Chris Thompson
Pricing was the most affordable. Great quality for the price.
Michael Harris
I needed my custom patches urgently. Delivered on time as promised.
Danielle Brooks
I really appreciate their customer service. Very professional team.
Kevin Walker
The delivery time was better than expected. Well packed patches.
Rachel Carter
Clear communication. Pricing was fair and quality was beyond expectations.
Brandon Lee
My team ordered in bulk, and everything was perfect. Highly recommended.