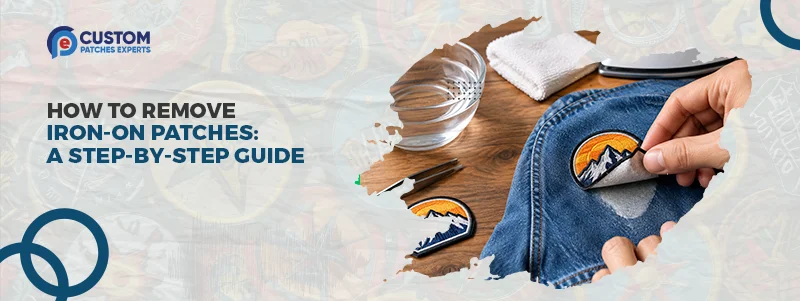
How to Remove Iron-On Patches: A Step-by-Step Guide
Iron-on patches are a great way to personalize jackets, shirts, jeans, bags, and uniforms. But what if you no longer want the patch? Maybe the design is old, you want to replace it, or the patch was placed in the wrong spot. Whatever the reason, removing an iron-on patch is possible with the right method.
The process is simple, but rushing can damage the fabric. In this guide, you will learn how to remove an iron-on patch, clean leftover glue, and protect your clothing during the process.
Order Your Custom Patch Now!
Can You Remove an Iron-On Patch?
Yes, most iron-on patches can be removed. These patches use heat-activated adhesive to stick to fabric. When you apply heat again, the adhesive becomes soft. This allows you to lift the patch from the fabric. Add a personal touch to your hats with custom patches for trucker hats made for brands, teams, and personal style.
However, some patches may be harder to remove than others. The type of fabric, strength of the adhesive, and age of the patch can all affect the process. Before you start, check the clothing care label. This is especially important for delicate fabrics.
What Do You Need?
You only need a few basic items to remove an iron-on patch. You may need an iron, a clean pressing cloth, tweezers, and a dull butter knife or flat tool. A hair dryer can also be useful for fabrics that should not receive direct high heat.
If glue remains after removing the patch, you can use a fabric-safe adhesive remover. Always test the product on a hidden part of the fabric first. Avoid sharp knives or blades. They can cut or scratch the material. Personalize jackets, shirts, bags, and uniforms with custom iron-on patches made for easy application.
Step 01: Check the Fabric
Start by checking the fabric before applying heat. Cotton and denim can usually handle moderate heat, while some synthetic or delicate materials may need extra care.
Read the care label to see whether ironing is allowed. If the label says not to iron the fabric, avoid placing a hot iron directly on it. You can also test your chosen method on a small hidden area. This can help you see how the fabric reacts to heat.
Step 02: Turn the Clothing Inside Out
If possible, turn the clothing inside out. Place the patch area on a flat, heat-safe surface. You will now be able to apply heat from the back of the patch.
This method can soften the adhesive without putting the iron directly on the patch. If you cannot turn the item inside out, place a clean pressing cloth over the patch. This creates a protective layer between the iron and the fabric.
Step 03: Apply Heat
Set your iron to a temperature that is safe for the fabric. Do not use steam unless the care label allows it. Place the iron over the back of the patch for several seconds. Do not leave it in one spot for too long.
The heat should soften the adhesive. Check the patch after a few seconds to see if the edges are starting to loosen. Too much heat can burn fabric or leave shiny marks, so work carefully.
Step 04: Lift One Corner
Turn the item back to the normal side once the adhesive has softened. Use your fingers or tweezers to gently lift one corner of the patch. If the corner does not move, do not pull harder. Apply heat again for a few seconds and try once more.
Once one corner starts lifting, slowly work along the edge. A dull butter knife can help lift the edge if needed. Keep it flat against the fabric and avoid pushing it into the material. Show off your school, team, or achievements with custom patches for letterman jackets designed to fit your style.
Step 05: Remove the Patch Slowly
Continue lifting the patch a little at a time. Do not try to pull the whole patch off in one motion. Strong adhesive can stretch the fabric or leave damage behind.
If the adhesive becomes hard again, stop and apply more heat. Work around the patch until it comes off completely. Take your time. A few extra minutes of careful work can help prevent damage to your clothing.
Step 06: Remove Leftover Glue
After the patch is removed, you may notice sticky residue on the fabric. Let the area cool before trying to clean it. Start by gently rubbing the residue with your fingers or a soft cloth. Some adhesive may come away easily.
For tougher residue, use a fabric-safe adhesive remover. Follow the product instructions and test it on a hidden area first. Another option is gentle heat. Place a clean pressing cloth or suitable paper over the sticky area and apply low heat. As the glue softens, some of it may transfer to the cloth or paper. Repeat carefully if needed.
Step 07: Wash the Item
Once the patch and most of the adhesive are gone, wash the clothing according to its care label. Washing can help remove small amounts of remaining residue.
Do not place the item in a dryer until you are sure the adhesive has been removed. Dryer heat can make leftover glue harder to clean. After washing, check the area again before drying the clothing. If you still see residue, clean it before putting the item in the dryer.
Need Help To Create Custom Patch
Right Now!
What If the Patch Will Not Come Off?
Some patches use strong adhesive and may take more effort to remove. If the patch does not lift easily, do not pull it with force. Instead, heat one small section at a time. This gives the adhesive time to soften and makes the patch easier to lift.
Older patches may also leave more residue behind. In this case, repeat the heating and cleaning process carefully. For expensive jackets, uniforms, bags, or delicate clothing, consider getting professional help. Protecting the item is more important than removing the patch quickly.
How to Avoid Fabric Damage
The safest approach is to use controlled heat and work slowly. Always follow the fabric care instructions. Do not use very high heat unless the material allows it. A pressing cloth can provide extra protection when using an iron.
Avoid sharp tools, excessive heat, and strong chemicals. These can cause cuts, burns, discoloration, or other damage. Testing your method on a hidden section is also a smart step, especially when working with a valuable item.
Can You Reuse an Iron-On Patch?
Sometimes you can reuse an iron-on patch after removing it. If the patch is still in good condition, it may be possible to attach it to another item. However, the original adhesive may become weaker after removal.
If you want to use the same design again, ask a custom patch supplier about another backing option. You can also order a new patch if the old one is damaged or no longer looks good.
Conclusion
Removing an iron-on patch is not difficult when you use the right method. Apply controlled heat, lift the patch slowly, and take care when cleaning leftover adhesive.
Always check the fabric care label before starting. If the material is delicate or valuable, avoid taking unnecessary risks. Once the old patch is gone, you can give your clothing a fresh look with a new custom design.
Custom Patches Experts provides quality custom patches, fast turnaround, and helpful service from design to production. Get a free quote today.
CATEGORIES
RECENT POSTS

Get A Custom Quote
Frequently Asked Questions
Yes. Heat can soften the adhesive and make the patch easier to remove.
Heat the back of the patch and gently lift one corner once the adhesive softens.
Yes, but you should use safe heat and avoid pulling the patch too hard.
Yes. A hair dryer can soften some adhesives and may work well on heat-sensitive fabrics.
Try gentle heat, a soft cloth, or a fabric-safe adhesive remover.
Sometimes. The patch may be reusable, but its original adhesive may be weaker.
Yes. Denim can usually handle moderate heat, but check its care label first.
It can take a few minutes, depending on the patch, adhesive, and fabric.
Yes. Use the same basic method, but follow the jacket's care instructions carefully.
Custom Patches Experts offers quality custom patches, fast turnaround, and a free quote.
Testimonials
Jason Miller
I was impressed that everything was smooth. I received my proof the same day.
Amanda Rodriguez
The staff was very friendly to work with. Helped me adjust my design.
Chris Thompson
Pricing was the most affordable. Great quality for the price.
Michael Harris
I needed my custom patches urgently. Delivered on time as promised.
Danielle Brooks
I really appreciate their customer service. Very professional team.
Kevin Walker
The delivery time was better than expected. Well packed patches.
Rachel Carter
Clear communication. Pricing was fair and quality was beyond expectations.
Brandon Lee
My team ordered in bulk, and everything was perfect. Highly recommended.