How to Iron On A Patch? A Comprehensive Guide
Adding a patch to your favorite jacket, backpack, hat, or jeans is one of the easiest ways to show your style. Patches can cover holes, conceal stains, support a cause, or enhance the uniqueness of an item. The good news is that you do not need special sewing skills to attach many patches. With the right tools and a few simple steps, you can iron on a patch at home and get great results.
Many people worry that the patch may peel off after a few washes. Others are afraid of damaging their clothing with too much heat. The truth is that applying an iron-on patch is simple when you follow the correct process.
What Is an Iron-On Patch?
An iron-on patch is a patch that comes with a heat-activated adhesive backing. When heat is applied with an iron, the adhesive melts and bonds to the fabric. This creates a strong attachment without the need for sewing. If you need waterproof patches for outdoor or heavy-use applications, consider our custom PVC patches.
Iron-on patches are popular because they are quick to apply and work well on many fabric types. They’re often found on denim jackets, jeans, backpacks, work uniforms, hoodies, and tote bags. While iron-on patches are convenient, they work best on fabrics that can handle heat. Materials like cotton and denim are usually ideal choices.
Tools You Need Before You Start
Before applying your patch, gather a few basic items. Having everything ready will make the process much easier.
You will need:
- an iron
- an ironing board or flat heat-resistant surface
- a clean cloth or pressing cloth
- the garment you want to decorate
- the iron-on patch
A pressing cloth is key. It protects the patch and fabric from direct heat. A thin cotton cloth works well for this purpose.
Order Your Custom Patch Now!
Check If Your Fabric Is Suitable
Not every fabric works well with iron-on patches. Some materials may melt, shrink, or become damaged when exposed to high heat.
Cotton, denim, canvas, and many polyester blends are generally safe choices. Delicate fabrics such as silk, nylon, leather, and some synthetics may not be safe to iron. If you want your design to stand out with a bold raised effect, consider our 3D embroidered patches.
If you are unsure, check the garment care label. If the label says “Do Not Iron,” you should avoid using an iron-on patch and consider sewing the patch instead.
Choose the Right Placement
Before heating the patch, take time to decide exactly where you want it. Lay the garment flat and place the patch in different positions until you find the look you like. Stand back and view the item from different angles. This step may seem small, but it helps prevent mistakes.
Once the patch is attached, moving it can be difficult. Double-check the location before applying heat. For jackets and shirts, many people place patches on the chest, sleeves, back, or shoulders. For backpacks, patches often look great on front pockets or main panels.
Prepare the Garment
A clean garment gives the adhesive the best chance to bond properly. Wash and dry the item before applying the patch. Dirt, dust, fabric softeners, and oils can reduce the strength of the adhesive. If you want a classic patch with rich texture and detailed stitching, consider our custom embroidered patches.
After washing, iron the area where the patch will be placed. This removes wrinkles and creates a smooth surface for application. A flat surface helps the adhesive make better contact with the fabric.
How to Iron On a Patch Step by Step
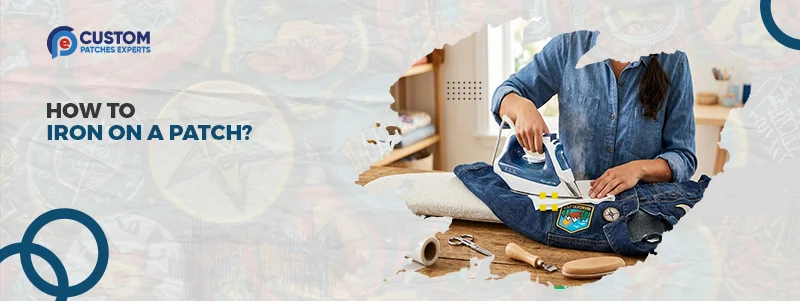
Now it is time to attach the patch. Start by placing your garment on a firm, heat-resistant surface. Position the patch exactly where you want it. Make sure the adhesive side is facing down against the fabric.
Set your iron to the recommended temperature. For most patches, a medium to high cotton setting works well. Turn off the steam function because moisture can affect the bonding process.
Place a thin cloth over the patch. This acts as a protective layer. Press the iron firmly onto the patch. Hold it in place for about 20 to 30 seconds. Avoid moving the iron back and forth like you would when ironing clothes. Instead, apply steady pressure.
After heating the front side, carefully turn the garment inside out if possible. Apply heat to the back side of the patch area for another 20 to 30 seconds. This helps to strengthen the bond. Allow the patch to cool completely before touching it.
Test the Attachment
Once the patch has cooled, check the edges carefully. Try lifting a corner gently with your finger. If the edge lifts easily, more heat may be needed.
Place the pressing cloth back over the patch and repeat the ironing process for another 10 to 15 seconds. A properly attached patch should sit flat against the fabric with no loose edges.
How to Make Your Patch Last Longer
Iron-on patches can last a long time when cared for correctly. Wait at least 24 hours before washing the garment. This gives the adhesive time to settle and bond fully.
When washing, turn the garment inside out. Use cold water and a gentle cycle whenever possible. Avoid high-heat drying settings. Air drying is often the safest option.
If you expect heavy use, adding a few stitches around the border can provide extra security. Many people combine ironing and sewing for maximum durability.
Can You Iron On a Patch Without an Iron?
Yes, there are alternatives if you do not have an iron. A heat press is one of the best options because it provides even pressure and consistent heat. Many businesses use heat presses for professional patch application.
In some cases, a hair straightener can work for small patches. However, it may not provide enough coverage for larger designs. For the best results, use a household iron or heat press.
Need Help To Create Custom Patch
Right Now!
When Sewing Is a Better Option
Iron-on patches are handy, but sometimes sewing is the better option. Items that get washed often, like work uniforms and kids’ clothes, usually handle sewn patches well. The stitching provides additional strength and reduces the chance of lifting edges.
Sewing is also recommended for materials that do not respond well to heat. Many customers pick iron-on backing for quick use. They often add stitching later for extra strength.
Why Quality Patches Matter
Not all patches are made the same. A high-quality patch uses better materials, stronger adhesives, and cleaner embroidery or printing. Low-quality patches might peel off fast, fade when washed, or lose their shape with time. When you order custom patches, choose a trusted supplier. Look for one that values quality, quick turnaround, and great customer service.
At Custom Patches Experts, we create custom patches designed for long-lasting performance. We can help turn your ideas into reality. No matter if you need patches for a business, club, sports team, school, or personal project, we’ve got you covered. We provide free quotes, great prices, and fast production times. This keeps the ordering process simple and stress-free.
Conclusion
Learning how to iron on a patch is easier than many people think. With a clean garment, the right heat, and some patience, you can attach a patch that looks good and stays put.
The key is to prepare the fabric well, apply steady pressure, and let the patch cool before using it. By following these easy steps, you can achieve a professional look from home.
Looking for high-quality custom patches for your project? Custom Patches Experts can help! Contact our team today for a free quote and see how easy it is to create patches that match your vision.
CATEGORIES
RECENT POSTS

Get A Custom Quote
Frequently Asked Questions
Place the patch on the fabric, cover it with a cloth, and press with a hot iron for 20–30 seconds until it bonds securely.
Most iron-on patches need 20 to 30 seconds of strong heat and pressure. Always check the patch instructions, too.
Yes, good iron-on patches can survive many washes if you apply and care for them correctly.
Yes, many patches are meant to stick on with heat only. But stitching can make them even stronger.
Cotton, denim, canvas, and polyester blends are great fabrics for iron-on patches.
A patch may peel if there was not enough heat or pressure or if it was applied to an unsuitable fabric.
Yes, many fabric backpacks can hold iron-on patches if the material can handle heat.
No, turn off the steam. Moisture can weaken the adhesive.
Wait at least 24 hours before washing to allow the adhesive to fully bond to the fabric.
Custom Patches Experts provides high-quality custom iron-on patches. They offer quick turnaround times and free quotes.
Testimonials
Jason Miller
I was impressed that everything was smooth. I received my proof the same day.
Amanda Rodriguez
The staff was very friendly to work with. Helped me adjust my design.
Chris Thompson
Pricing was the most affordable. Great quality for the price.
Michael Harris
I needed my custom patches urgently. Delivered on time as promised.
Danielle Brooks
I really appreciate their customer service. Very professional team.
Kevin Walker
The delivery time was better than expected. Well packed patches.
Rachel Carter
Clear communication. Pricing was fair and quality was beyond expectations.
Brandon Lee
My team ordered in bulk, and everything was perfect. Highly recommended.